Capturing the Beauty: A Practical Guide to Using the Wonderful Pink Roses Watercolor Set
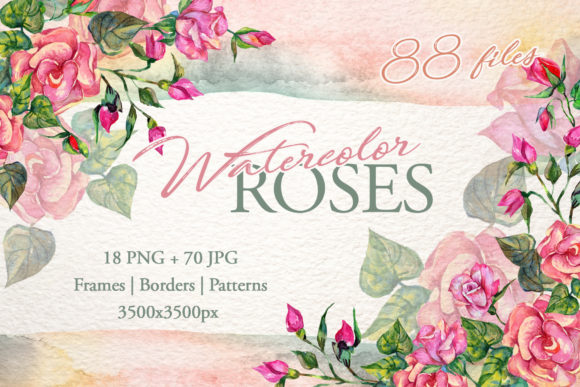
Whether you are designing wedding invitations, crafting a brand identity for a boutique, or sprucing up a blog layout, watercolor florals offer a timeless aesthetic. The Wonderful Pink Roses Watercolor Set, with its 88 hand-painted files, promises a complete toolkit—from isolated blooms to seamless patterns and decorative frames. But having a comprehensive set is one thing; using it to its fullest potential without running into common design frustrations is another. Let’s walk through practical approaches to ensure your projects look polished, professional, and precisely how you imagined them.
Understanding Your Toolkit: PNG vs. JPG (And Why It Matters)
One of the first hurdles users face is understanding the two file types included in the set. You receive 18 PNG files (isolated elements with transparent backgrounds) and 70 JPG files (patterns, frames, and backgrounds).
The Common Mistake: Using the JPG frames directly over a colored or complex background in a DIY tool like Canva or Word. A white or solid JPG border can look clunky, as it comes with its own opaque background.
A Better Approach: This is where the wonderful pink roses PNG watercolor set elements truly shine. Because they have no background, you can effortlessly layer the isolated watercolor roses and wildflowers over the JPG patterns. For example, use a soft pink JPG pattern as your background. Then, add a transparent PNG frame over it. Finally, layer a few isolated PNG roses and leaves in the corners to create depth. This technique is what gives wedding suites and print posters that sophisticated, multi-dimensional “designer” feel.
Preserving the "Hand-Painted" Integrity
Watercolor graphics are prized for their organic texture, soft edges, and subtle color variations. The wonderful pink roses flowers in this set were painted by hand, giving them a natural, vibrant quality that digital brushes often struggle to replicate.
The Common Mistake: Over-processing the images. Applying harsh sharpening filters, heavily editing the saturation, or dropping them onto stark white backgrounds with heavy digital drop shadows can kill the delicate watercolor effect.
A Better Approach: Let the aquarelle elements breathe. Use soft blending modes like “Multiply” for layering textures or “Screen” for light overlays. If you adjust the colors, do so gently to maintain the subtle pigment washes. For quotes or branding, place the watercolor elements on textured paper backgrounds (kraft paper, linen, or soft pastels) to enhance the painted look rather than fighting against it.
Resolution Reality: Avoiding Pixelation and Soft Prints
A significant advantage of this bundle is its commercial-grade resolution. The patterns and frames are massive JPG files at 3500x3500 pixels at 300 DPI. The wonderful pink roses watercolor set PNG files are also high-resolution, ensuring your designs look crisp whether printed or displayed.
The Common Mistake: Dragging the preview images from a website or a low-resolution thumbnail into a canvas. This is the fastest way to end up with a blurry, pixelated poster or greeting card that ruins the professional look you are aiming for.
A Better Approach: Always download the designated source files to your computer first. When placing them into your software, check the actual DPI. For instance, in Photoshop or Affinity, create a document at 300 DPI and place the element. That 3500px image will give you roughly an 11.5 x 11.5-inch design area at print quality—more than enough for a full flyer or poster. For digital use (like blogs or social media), you can scale the image down confidently for sharp results, but scaling it up will introduce fuzziness.
Getting Organized: File Management and Commercial Use
For entrepreneurs and freelancers, efficiency is key. This set is an ideal material for DIY projects, wedding invitations, greeting cards, and more, but finding the right file quickly can save hours of frustration.
The Common Mistake: Digging through the 88 files every single time you start a new project. This is inefficient and often leads to using the wrong format or wasting time searching for the perfect rose.
A Better Approach: Before starting, organize the files into folders: "Patterns" (JPG), "Frames & Borders" (JPG), "Isolated Elements" (PNG). Rename the files if necessary to something intuitive. For commercial use, check the license included with the set. Most watercolor sets of this nature allow for use in physical products (cards, posters) and digital designs (social media, blogs) for small businesses. Understanding your licensing ensures you can confidently sell your finished products without legal worries.
Editing with Intent: Color and Composition Hacks
One of the benefits of the set is that the elements are described as fully editable in terms of size and color adjustments. This flexibility is a powerful tool when used correctly.
The Common Mistake: Making all the roses the exact same shade of pink or resizing an element disproportionately. Real watercolor has beautiful variation in tone, and distorting the aspect ratio can ruin the delicate brush strokes that make the wildflowers look authentic.
A Better Approach: Use selective color adjustment tools (Hue/Saturation) to create subtle variations, linking the pinks to your brand's specific Pantone or hex color. Maintain the aspect ratio when resizing to preserve the natural brush shape. A great tip for DIYers using Canva or Photoshop is to group the elements and use a "Color Overlay" or "Hue Shift" layer to quickly test different palettes. This keeps the hand-painted texture alive while customizing it completely to your project.
Overcoming "Endless Possibilities" Paralysis
With 88 files, a common complaint isn't a lack of options, but too many. This can lead to cluttered designs where every available frame, border, and element is crammed into one layout, overwhelming the viewer.
The Common Mistake: Thinking you must use everything at once. A design with too many conflicting patterns and borders feels chaotic, not romantic.
A Better Approach: Curate a specific palette for your project. If you are designing a greeting card, pick one frame as the star, one subtle background pattern, and 2-3 isolated floral elements. For a blog post header, maybe just use a border and a single wildflower branch. The cohesive nature of the “Wonderful Pink Roses” theme means that any combination of files will look harmonious, but restraint is the secret to a modern, premium look.
DIY vs. Professional Output: The Finishing Touches
Finally, consider how you are applying these graphics to your specific project, whether it is a digital quote for Instagram or a physical invitation for a wedding. The devil is in the details.
The Common Mistake: Forgetting the medium. A design that looks great on a backlit screen might print too dark or with muddy details. Similarly, digital files exported as low-resolution JPGs lose the crisp detail of the hand-painted elements.
A Better Approach: Always test print a small sample before committing to 100 invites. Adjust brightness and contrast for print vs. screen. For digital use, export at a high PNG quality to preserve the soft watercolor edges. Pay attention to your typography. Watercolor florals pair beautifully with simple, classic fonts. Avoid thick, harsh, or overly decorative fonts that will compete for attention. Let the wonderful pink roses watercolor set provide the visual texture and let your words do the talking.
By understanding the structure of the set and avoiding these common pitfalls, you can confidently create stunning, professional-grade designs that perfectly capture the gentle beauty of hand-painted watercolor art.